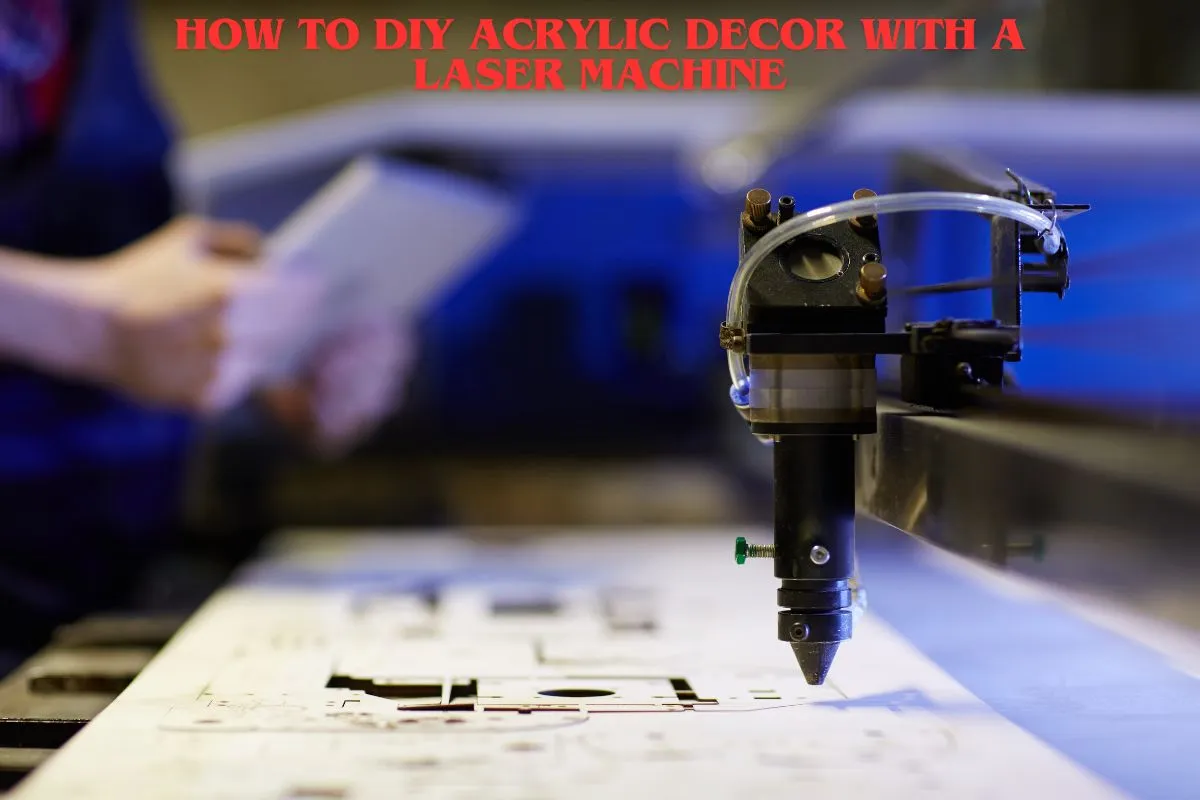
Acrylic decor has become increasingly popular in modern interior design due to its versatility, durability, and sleek appearance. Whether you’re looking to create personalized home accents, customizable gifts, or unique business displays, acrylic offers endless possibilities. Leveraging a laser cutting machine can elevate your DIY projects by providing precision, intricate designs, and professional-quality finishes. This comprehensive guide will walk you through the process of creating stunning acrylic decor using a laser machine, from selecting materials to finishing touches.
Essential Tools and Materials
Before diving into your DIY acrylic decor project, ensure you have the necessary tools and materials:
Tools:
- Laser Cutting Machine: Essential for precise cutting and engraving. There are numerous models available on the market. Choose a CO2 laser machine from a professional brand.
- Design Software: Programs like Adobe Illustrator, CorelDRAW, or free alternatives like Inkscape are used to create and edit designs.
- Safety Equipment: Protective eyewear and proper ventilation systems.
- Measuring Tools: Rulers, calipers, and square tools for accurate measurements.
- Finishing Tools: Sandpaper, polishing kits, and adhesive for assembly.
Materials:
- Acrylic Sheets: Available in various colors, thicknesses, and finishes (clear, frosted, colored).
- Adhesives: Suitable for bonding acrylic, such as acrylic solvent cement or strong glues.
- Additional Decor Elements: LED lights, paint, vinyl decals, or other embellishments based on your design.
Getting Started: Design Planning
A successful DIY acrylic decor project begins with meticulous design planning. Follow these steps to create a solid foundation for your project:
A. Define Your Project Scope
Decide what type of decor you want to create. Common acrylic decor projects include:
- Wall art and signs
- Lamps and lighting fixtures
- Decorative panels and screens
- Personalized nameplates
- Clocks and organizers
B. Sketch Your Ideas
Draw rough sketches of your design to visualize the final product. Consider dimensions, shapes, and how different components will fit together.
C. Choose a Style
Determine the aesthetic you aim to achieve. Whether it’s minimalist, geometric, floral, or intricate patterns, your chosen style will guide the design process.
D. Gather Inspiration
Explore design websites, Pinterest, and craft communities to gather ideas and inspiration. This can help refine your concept and spark creativity.
Preparing Your Design for Laser Cutting
Once your design plan is in place, the next step is to prepare it for laser cutting and engraving.
A. Digital Design Creation
- Choose the Right Software: Use vector-based design software like Adobe Illustrator, CorelDRAW, or Inkscape. These programs allow for precise control over your design elements.
- Create Vector Paths: Laser cutters follow vector paths to determine where to cut or engrave. Ensure your design is composed of vector lines and shapes.
- Separate Layers for Cutting and Engraving: Organize your design into different layers or colors to differentiate between cutting (outline) and engraving (fill). Typically, red lines indicate cutting, while black or blue lines represent engraving.
B. Optimize Design Elements
Simplify Complex Designs: Intricate details can be challenging to laser cut, especially on thicker acrylic. Simplify designs where necessary.
Consider Material Thickness: Ensure that your design accounts for the thickness of the acrylic sheet to maintain structural integrity.
Add Tabs or Connectors: For assembled pieces, include tabs or connectors in your design to facilitate easy assembly.
C. Test Your Design
Before committing to your final acrylic sheet, run a test on a smaller or less expensive material to ensure the design translates well through the laser.
Setting Up the Laser Machine
Proper setup of your laser cutting machine is crucial for achieving high-quality results.
A. Machine Calibration
Align the Laser: Ensure the laser head is correctly aligned with the work area.
Focus the Laser: Adjust the focus to match the thickness of your acrylic sheet for precise cuts and engravings.
B. Material Preparation
Clean the Acrylic: Remove any dust or debris from the acrylic sheet to prevent imperfections in the cut or engraving.
Secure the Material: Place the acrylic sheet on the laser bed, ensuring it’s flat and securely held to prevent movement during operation.
C. Software Settings
Import Your Design: Load your prepared vector file into the laser machine’s software.
Set Cutting Parameters: Adjust settings like power, speed, and frequency based on the acrylic thickness and desired outcome. Refer to the machine’s guidelines or perform a test cut.
Arrange Design Layout: Optimize the placement of your design on the acrylic sheet to minimize waste.
Laser Cutting and Engraving Techniques
Understanding the different techniques involved in laser cutting and engraving will help you maximize the potential of your projects.
A. Cutting
Cutting involves slicing through the acrylic sheet to create the desired shape. Key considerations include:
- Edge Quality: Higher power settings result in cleaner cuts but may cause melting or discoloration.
- Kerf Width: The width of the cut made by the laser, typically around 0.1mm. Account for this in your design measurements.
- Ventilation: Proper exhaust systems are essential to manage fumes and prevent fire hazards.
B. Engraving
Engraving, etching, or marking the surface of the acrylic without cutting through it.
- Depth Control: Adjusting the power and speed settings controls the depth of the engraving.
- Detail Resolution: Higher resolutions produce finer details but may take longer to complete.
- Multi-Layer Engraving: Create depth by layering multiple engravings, adding complexity to your design.
C. Etching vs. Engraving
- Etching: Usually refers to a shallow, surface-level marking, suitable for adding subtle details or text.
- Deep Engraving: Achieves a more pronounced effect, ideal for bold designs or branding elements.
Assembling Your Acrylic Decor
After cutting and engraving, assembling your acrylic pieces is the next step to bring your decor to life.
A. Types of Assemblies
Adhesive Bonding: Use acrylic solvent cement or strong adhesives to join pieces. Solvent cement creates a seamless bond by melting the acrylic surfaces together.
Mechanical Fasteners: Screws, bolts, or clips can hold acrylic pieces together, offering flexibility for modular designs.
Interlocking Designs: Incorporate tabs and slots in your design to allow pieces to lock together without additional hardware.
B. Alignment and Positioning
Ensure all pieces align correctly by using jigs or templates during assembly. Accurate alignment is crucial for the structural integrity and aesthetic appeal of your decor.
C. Reinforcement and Support
For larger or more complex assemblies, consider adding internal supports or braces to enhance stability and durability.
8. Finishing Touches and Customization
Enhance your acrylic decor with various finishing touches to achieve a polished and professional look.
A. Polishing Edges
After cutting, acrylic edges may appear rough or frosted. Use fine-grit sandpaper or a polishing kit to smooth and clear the edges, giving them a sharp, clean appearance.
B. Adding Color and Lighting
Colored Acrylic: Utilize different colored acrylic sheets to add vibrancy to your design.
LED Integration: Incorporate LED strips or bulbs to illuminate your acrylic pieces, creating stunning light effects and enhancing visibility.
C. Surface Treatments
Apply vinyl decals, paint, or other surface treatments to personalize your decor further. Ensure compatibility with acrylic to prevent damage during application.
D. Protective Coatings
Apply a clear coating or UV-resistant varnish to protect your acrylic from scratches and fading, especially for pieces exposed to sunlight or frequent handling.
Safety Tips and Best Practices
Working with laser machines and acrylic requires adherence to safety protocols to prevent accidents and ensure quality results.
A. Ventilation and Air Quality
Ensure your workspace is well-ventilated to dissipate fumes generated during laser cutting and engraving. Use exhaust fans or dedicated ventilation systems.
B. Protective Gear
Always wear protective eyewear designed for your laser machine’s wavelength. Avoid direct exposure to laser beams.
C. Fire Safety
Keep a fire extinguisher nearby and never leave the laser machine unattended during operation. Ensure flammable materials are kept away from the workspace.
D. Material Handling
Handle acrylic sheets with care to prevent cracking or breaking. Store them in a clean, dry environment to avoid scratches and damage.
E. Machine Maintenance
Regularly clean and maintain your laser machine to ensure optimal performance and prolong its lifespan.
10. Creative DIY Acrylic Decor Ideas
To inspire your next project, here are some creative acrylic decor ideas you can craft with a laser machine:
Customized Wall Art
Create intricate designs, quotes, or geometric patterns to adorn your walls. Combine different colored acrylics for a multi-dimensional effect.
Acrylic Clocks
Design modern and minimalist clocks by cutting and engraving acrylic pieces. Incorporate lighting for a striking visual centerpiece.
Decorative Lamps and Lampshades
Craft unique lampshades with laser-cut patterns that cast beautiful shadows when illuminated. Experiment with various shapes and designs to match your interior style.
Photo Frames and Display Cases
Personalize photo frames or create elegant display cases for collectibles. Engrave names, dates, or intricate patterns to add a personalized touch.
Acrylic Shelves and Storage Solutions
Design sleek, floating shelves or modular storage units. The transparency of acrylic creates an illusion of space, making them perfect for modern interiors.
Business Signage and Branding Elements
For entrepreneurs, laser-cut acrylic signs, logos, and branding elements can elevate your business’s visual identity with a professional and contemporary look.
Jewelry and Accessory Holders
Create stylish holders for rings, necklaces, or other accessories. Laser precision allows for delicate and functional designs.
Conclusion
DIY acrylic decor offers a blend of creativity, precision, and modern aesthetics, making it an excellent choice for both novice and experienced crafters. Utilizing a laser cutting machine enhances the possibilities, allowing for intricate designs and professional-quality finishes that can transform any space. By following the steps outlined in this guide—from design planning to finishing touches—you can create stunning acrylic decor pieces that reflect your style and craftsmanship.
Embrace the versatility of acrylic and the precision of laser technology to bring your decorative visions to life. Whether you’re looking to personalize your living space, create meaningful gifts, or enhance your business environment, DIY acrylic decor with a laser machine is a rewarding and impactful endeavor.
Related posts:
 Harris Tweed Sofa Clearance: A Guide to Style, Savings, and Sustainability
 Modern Driveway Gates: Elevate Your Home’s Style and Security
 Do They Make House Siding from 2007 Anymore?
 The History of Vanities: From Dressing Tables to Modern Designs
 Bedroom Paint Color Ideas: Choosing the Right Hue
 Sculptures for Every Style: Finding the Right Piece for Your Decor
 Unnatural Flooring: A Modern and Durable Solution