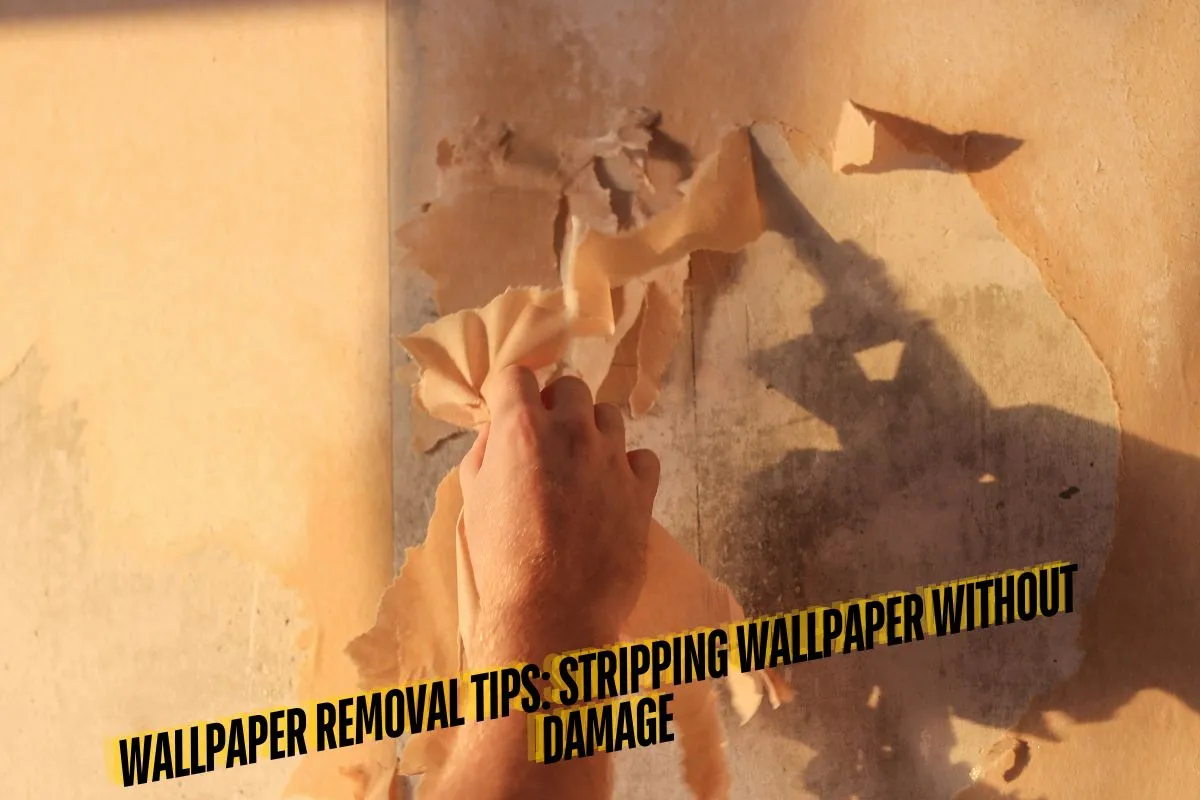
Removing wallpaper can seem like a daunting task, especially if you’re worried about damaging your walls in the process. However, with the right approach, tools, and a bit of patience, you can strip wallpaper without leaving your walls in a mess. Whether you’re a seasoned DIY enthusiast or a complete beginner, these tips will help you get the job done efficiently and effectively.
Understanding Your Wallpaper Type
Before you begin the removal process, it’s essential to understand the type of wallpaper you’re dealing with. Not all wallpapers are created equal, and different types require different approaches.
1. Peelable Wallpaper:
Peelable wallpaper is designed to be removed easily. The top layer peels off, leaving a paper backing that can be removed with water and a scraper.
2. Vinyl Wallpaper:
Vinyl wallpaper is more durable and water-resistant, making it slightly more challenging to remove. It often requires scoring before applying a remover solution.
3. Traditional Wallpaper:
Traditional wallpaper, especially older styles, can be the most stubborn to remove. It often requires the use of a steamer or chemical stripper to break down the adhesive.
Understanding the type of wallpaper you have will determine your approach and the tools you’ll need. As Bob Vila, a home improvement expert, advises, “Proper preparation is key to successful wallpaper removal. Start by scoring the paper to loosen the adhesive.”
Essential Tools for Wallpaper Removal
Having the right tools on hand can make all the difference. Here’s a list of essential items you’ll need:
- Scoring Tool: To puncture the wallpaper and allow moisture to penetrate.
- Wallpaper Steamer: Ideal for loosening stubborn wallpaper and adhesive.
- Putty Knife or Scraper: For gently lifting and removing the wallpaper.
- Sponge and Bucket: To apply water or a stripping solution.
- Wallpaper Stripper Solution: For breaking down the adhesive, especially for stubborn wallpapers.
- Protective Gear: Gloves and safety glasses to protect your skin and eyes from chemicals.
A representative from Home Depot emphasizes, “Invest in quality wallpaper removal tools, such as a steamer and a putty knife, to minimize damage to your walls.”
Step-by-Step Guide to Removing Wallpaper
-
Prepare the Room:
- Start by removing all furniture, or cover it with plastic sheeting to protect it from dust and debris.
- Turn off the electricity in the room and remove the switch plates and outlet covers.
-
Score the Wallpaper:
- Use a scoring tool to lightly perforate the wallpaper. This step is crucial as it allows moisture to penetrate the adhesive, making the removal process easier.
-
Apply a Removal Solution:
- Mix warm water with a few drops of dish soap or use a commercial wallpaper stripper. Apply it generously to the wallpaper using a sponge or spray bottle. Let it soak for 15-20 minutes.
According to the DIY Network, “For stubborn wallpaper, consider using a chemical wallpaper stripper. Always follow the manufacturer’s instructions and wear protective gear.”
-
Use a Wallpaper Steamer:
- If the wallpaper is particularly stubborn, a steamer can help. Hold the steamer against the wall for a few seconds to loosen the adhesive, then use your scraper to lift the paper.
Tip: Work in small sections to prevent the wallpaper from drying out before you can remove it.
-
Scrape Gently:
- Begin scraping at the seams of the wallpaper, working your way down. Be gentle to avoid damaging the wall underneath. If you encounter resistance, reapply the removal solution or use the steamer again.
As the team from This Old House suggests, “Use a wallpaper steamer to effectively loosen the adhesive, making removal easier.”
-
Clean the Wall:
- Once all the wallpaper is removed, wash the walls with warm, soapy water to remove any remaining adhesive. Rinse with clean water and allow the walls to dry thoroughly before repainting or applying new wallpaper.
Avoiding Common Pitfalls
While wallpaper removal can be straightforward, there are a few common pitfalls to watch out for:
1. Skipping the Scoring Step:
- Skipping the scoring step can make it difficult for the removal solution to penetrate the adhesive, leading to more work down the line. Take the time to score the wallpaper properly.
2. Rushing the Process:
- Patience is key when removing wallpaper. Trying to rush the process can lead to gouging the walls or missing adhesive, which can cause problems later on.
3. Not Protecting the Room:
- Protecting your floors, furniture, and electrical outlets is crucial. Wallpaper removal can be messy, and water or chemicals can damage your belongings if you’re not careful.
Learning the Hard Way
When I first attempted to remove wallpaper in my old house, I thought it would be a quick weekend project. Armed with a scraper and a bottle of vinegar solution, I jumped right in without doing much research. Big mistake. The wallpaper was old and stubborn, and I hadn’t scored it properly. After hours of scraping and very little progress, I ended up damaging the wall underneath, leading to an expensive repair job.
That experience taught me the importance of preparation and patience. The next time I tackled wallpaper removal, I invested in a quality steamer, and took my time with scoring, and the difference was night and day. The wallpaper came off smoothly, and the walls were left intact, ready for a fresh coat of paint.
When to Call in the Professionals
While DIY wallpaper removal is entirely possible, there are times when it might be worth calling in the professionals. If you’re dealing with multiple layers of old wallpaper, and damaged walls, or if the project seems overwhelming, a professional painter can ensure the job is done quickly and without damage.
A professional painter notes, “For challenging wallpaper removal projects, consider hiring a professional painter to ensure a smooth and efficient process.”
Preparing for Repainting or New Wallpaper
After removing the wallpaper, your walls will need some preparation before you can repaint or apply new wallpaper.
1. Sand the Walls:
- Lightly sand the walls to remove any rough spots or remaining adhesive. This step will help create a smooth surface for painting or new wallpaper.
2. Apply a Wallpaper Primer:
- If you’re planning to apply new wallpaper, consider using a wallpaper primer to seal the surface. This will prevent the old wallpaper’s adhesive from bleeding through and affecting the new wallpaper.
A home improvement blogger advises, “If you’re planning to repaint, consider using a wallpaper primer to seal the surface and prevent the old wallpaper from bleeding through.”
3. Choose the Right Paint or Wallpaper:
- Finally, choose a paint or wallpaper that complements the room. If you’ve just removed wallpaper, a fresh coat of paint can completely transform the space.
Conclusion: Enjoy Your Freshly Revamped Space
Removing wallpaper can be a labor-intensive task, but the results are worth it. By following these tips and taking your time, you can strip wallpaper without damaging your walls, leaving you with a blank canvas for your next home improvement project.
Remember, the key to success is preparation, patience, and the right tools. Whether you’re tackling a small room or a whole house, these wallpaper removal tips will help you achieve a smooth, clean finish, ready for whatever comes next.
Related posts:
 Protect Your Home: A Guide to Building a Roof That Lasts
 DIY or Hire a Pro? How to Decide on Building Your Roof Yourself
 Exploring Jesse Duplantis’ House: A Look Inside the Controversy and Size
 Small Closet, Big Impact: Space-Saving Storage Solutions
 How Much Does It Cost to Build a 24×24 Garage? A Detailed Guide
 Can I Use Acrylic Paint on Vivarium Interiors?
 Wallpaper for Kids: Fun and Functional Designs for Playrooms