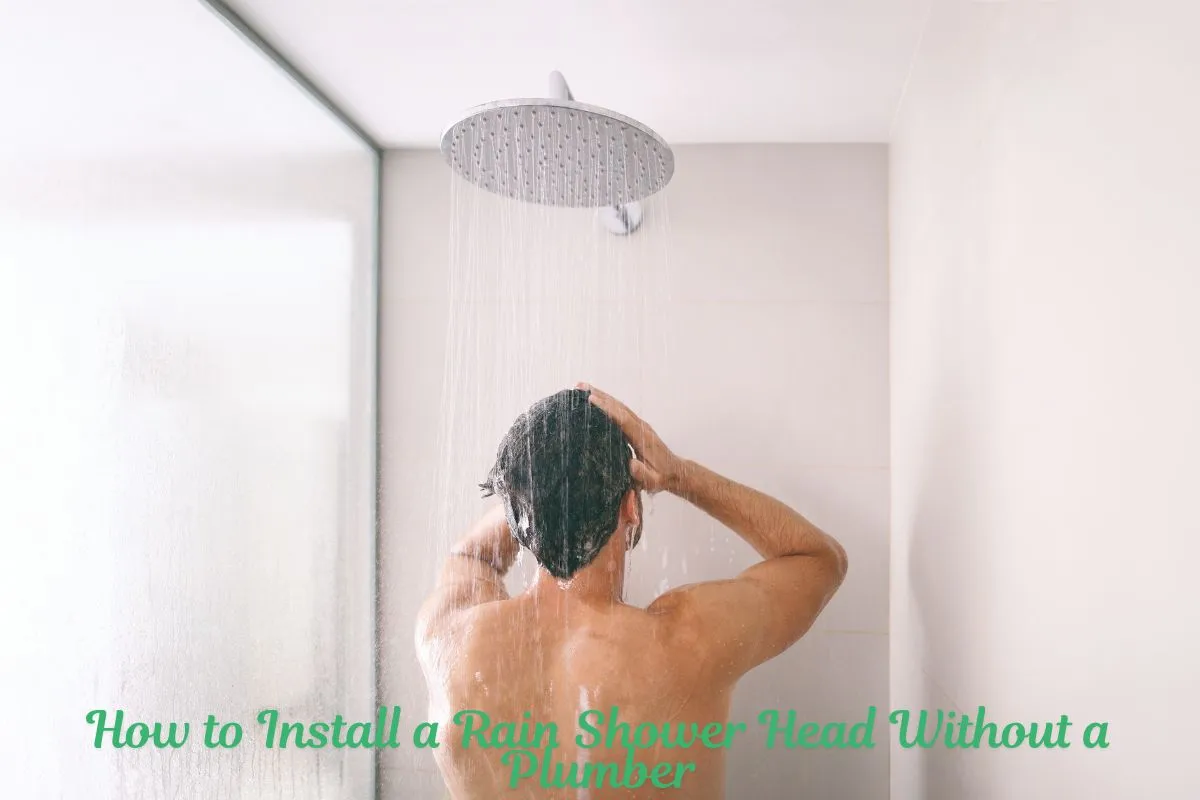
Ever dreamed of standing under a peaceful waterfall in your own shower? That’s exactly what a rain shower head gives you. The best part? You don’t need to hire a plumber to install it.
I know this because I installed mine all by myself—and I’ve never worked in plumbing a day in my life. If I can do it, you can too.
In this guide, I’ll walk you through every step in a simple, easy-to-follow way. Whether you’re brand new to DIY or just looking to save a few bucks, you’ll learn how to install a rain shower head on your own—no sweat, no leaks.
Why Switch to a Rain Shower Head?
Before we jump into the how-to, let’s talk about why so many people are upgrading to rain shower heads.
-
Soothing spa-like feel
-
Even water coverage over your whole body
-
Great for relaxing muscles after a long day
-
Modern look that upgrades any bathroom
As Michelle Driscoll, home renovation expert, shares on The Spruce:
“For a luxurious spa-like experience, mount your rain shower head at least 80 inches above the shower floor for optimal water flow.”
— Michelle Driscoll, The Spruce
Tools and Materials You’ll Need
Don’t worry—no power tools needed! You only need a few items, and many might already be in your home.
🛠️ Supplies Checklist:
-
Adjustable wrench or pliers
-
Teflon tape (plumber’s tape)
-
Rag or old towel
-
Step stool or ladder (if your shower head is high)
-
New rain shower head (preferably with a ½-inch NPT thread)
“Choose a rain shower head with a standard size (1/2-inch NPT) to ensure compatibility with most existing shower arms.”
— Richard Trethewey, HGTV’s Ask This Old House
Step-by-Step: How to Install a Rain Shower Head
Now let’s get to the fun part!
Step 1: Remove the Old Shower Head
This is super simple. Just turn the old shower head counterclockwise to unscrew it. You might need a wrench if it’s tight.
Pro Tip: Wrap the old shower head in a towel before using your wrench to avoid scratches.
I still remember when I removed mine—it was a cheap plastic head from the early 2000s. It came off in seconds, and I instantly knew my bathroom was about to feel brand new.
Step 2: Clean the Shower Arm Threads
Once the old head is off, you’ll see the threaded end of your shower arm.
Use a rag to wipe away any old tape or buildup. This gives your new rain shower head a clean, smooth base to connect with.
Step 3: Wrap Teflon Tape Around Threads
This step is super important to avoid leaks.
“Always use Teflon tape on the shower arm threads to prevent leaks—it’s a small step that makes a big difference in your installation.”
— Jalyn Robinson, This Old House
Wrap the Teflon tape clockwise around the threads 2–3 times. Press it down gently with your fingers to smooth it out.
Step 4: Attach the New Rain Shower Head
Screw your new shower head onto the shower arm clockwise by hand.
Once it’s snug, use a wrench to tighten it gently. Use a rag between the tool and fixture to avoid scratching.
“Installing a rain shower head is a simple DIY project that requires just a few basic tools—no plumber needed if you follow the instructions carefully.”
— Bob Vila, BobVila.com
If your shower head includes a rubber washer, make sure it’s in place before screwing it on.
“If your shower head includes a rubber washer, don’t skip it—this little component is key to preventing drips.”
— Merle Henkenius, Family Handyman
Step 5: Turn on the Water and Check for Leaks
This is the moment of truth.
Turn on the water slowly and check:
✅ Are there leaks around the connection?
✅ Is the water flowing evenly from the head?
✅ Is the pressure strong enough?
If there are leaks, gently tighten the head a little more or reapply Teflon tape.
“If you’re installing an overhead rain shower, check your water pressure first—some models require a minimum PSI to function properly.”
— Ed Del Grande, Builder Magazine
Tips to Improve the Shower Experience
✅ Use a Shower Arm Extension
This moves your shower head up and out from the wall for better coverage, especially helpful if you’re tall!
✅ Choose a Large Shower Head
A wider diameter gives more of that “rainfall” feeling. Look for 8-inch or 10-inch heads for full-body coverage.
✅ Upgrade to a Dual Shower Head
Want flexibility? Add a handheld shower to your rain head. These combo kits are easy to install and great for rinsing off kids, pets, or cleaning the shower.
Personal Story: My First Time DIY Shower Upgrade
When I first moved into my apartment, the bathroom was… meh. The old shower head dribbled water like a leaky faucet. I wanted something better—more relaxing.
I watched two videos, read a guide, and decided to try replacing it myself.
The process took about 20 minutes, and the result? A beautiful rainfall shower that makes every morning feel like a mini spa retreat. Plus, I saved about $100 by not calling a plumber.
And that’s why I recommend this project to everyone—it’s empowering, easy, and honestly kind of fun.
Common Mistakes to Avoid
Even though it’s simple, here are a few mistakes to dodge:
❌ Forgetting to use Teflon tape
❌ Overtightening the head (this can crack it)
❌ Using the wrong size thread
❌ Skipping the rubber washer
❌ Not checking water pressure first
Follow the steps above, and you’ll skip all these pitfalls.
What If I Have Low Water Pressure?
Rain shower heads use wider spray patterns, so water pressure can feel weaker.
If your home has low PSI, look for high-pressure rain shower heads designed to work in these conditions. They often have pressure-boosting tech built in.
Can I Install a Ceiling-Mounted Shower Head?
Yes—but this one is a bit more complex.
Ceiling-mounted heads usually require a new pipe coming from the ceiling. If you’re not comfortable with plumbing work inside walls, this might be one to leave to a professional.
But if you’re just replacing a wall-mounted head, stick with that—you’ll still get that overhead rainfall feel using an S-shaped or L-shaped shower arm extension.
Choosing the Right Rain Shower Head
There are tons of options out there, so how do you pick the right one?
Here’s what to look for:
-
Size: 8 to 12 inches is ideal
-
Material: Brass or stainless steel lasts longer than plastic
-
Spray settings: Some offer gentle mist or massaging pulses
-
Ease of installation: Look for “tool-free” or “universal fit.”
Bonus tip: Check online reviews before buying. It’s amazing how much insight other users give.
Final Thoughts: You’ve Got This
Installing a rain shower head by yourself is one of the easiest and most satisfying DIY upgrades you can do.
You’ll enjoy:
-
Better showers
-
A more stylish bathroom
-
A sense of accomplishment
-
And you’ll save serious money
As Bob Vila put it best:
“No plumber needed if you follow the instructions carefully.”
— Bob Vila, BobVila.com
So grab your wrench, roll up your sleeves, and give it a go. You might just love DIY more than you thought.
Sources
-
Bob Vila, BobVila.com
-
Jalyn Robinson, This Old House
-
Richard Trethewey, HGTV’s Ask This Old House
-
Merle Henkenius, Family Handyman
-
Michelle Driscoll, The Spruce
-
Ed Del Grande, Builder Magazine