
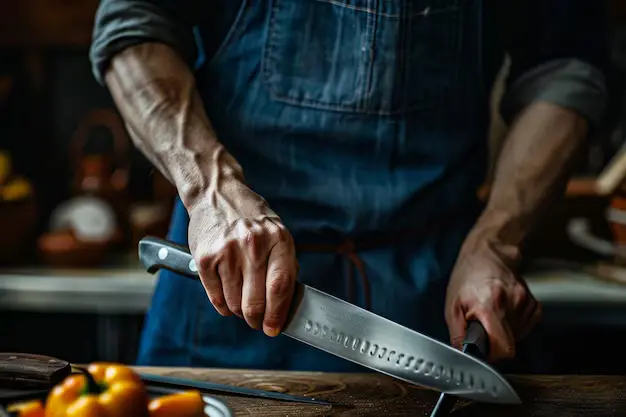
A sharp knife is a cook’s best friend. It makes slicing, dicing, and chopping easier and safer. Yet, many home cooks struggle with dull knives, which can be both frustrating and dangerous. In this guide, we’ll explore how to sharpen your knives like a pro, ensuring your kitchen tools are always in top shape. We’ll also share insights from renowned chefs and practical tips that are easy to follow.
Why Sharp Knives Matter
“A dull knife is a dangerous knife. Regular sharpening is essential for safety and efficiency,” says Jacques Pépin, a renowned chef. When a knife is sharp, it requires less force to cut through food, reducing the risk of slipping and causing injury. Additionally, sharp knives provide cleaner cuts, which can improve the texture and appearance of your dishes.
Choosing the Right Sharpening Tools
Thomas Keller, a celebrated chef and restaurateur, emphasizes, “Understanding the different sharpening methods and tools is crucial for achieving optimal results.” There are several tools available for sharpening knives, each with its advantages.
- Sharpening Stones (Whetstones)
- Pros: Offers a fine edge, suitable for all types of knives.
- Cons: Requires practice to master the technique.
- Honing Steels
- Pros: Maintains the edge between sharpenings.
- Cons: Doesn’t actually sharpen but realigns the blade.
- Electric Sharpeners
- Pros: Quick and easy to use.
- Cons: Can remove more metal than necessary, shortening the knife’s life.
- Manual Pull-Through Sharpeners
- Pros: User-friendly and affordable.
- Cons: Less precise than stones.
How to Sharpen with a Whetstone
Using a whetstone is one of the best ways to achieve a razor-sharp edge. Anthony Bourdain, an author and chef, advises, “Invest in a quality sharpening stone or honing steel for long-term knife care.” Here’s a step-by-step guide:
- Soak the Stone: If using a water stone, soak it in water for about 10-15 minutes.
- Prepare the Knife: Hold the knife at a 20-degree angle against the stone.
- Sharpen the Edge: Move the knife in a sweeping motion across the stone, maintaining the angle. Repeat on both sides.
- Hone the Blade: Use a honing steel to realign the edge after sharpening.
- Clean and Test: Wash the knife and test the sharpness by slicing through a sheet of paper.
Maintaining Your Knives
Gordon Ramsay, a celebrity chef, believes, “Practice makes perfect. Sharpening knives takes time and patience, but the results are worth it.” Here are some tips for maintaining your knives:
- Regular Honing: Hone your knives frequently to keep the edge aligned.
- Proper Storage: Store knives in a knife block or on a magnetic strip to protect the edges.
- Gentle Cleaning: Hand wash and dry your knives immediately after use to prevent rust.
My Sharpening Journey
I remember the first time I tried sharpening my knives with a whetstone. It was a bit intimidating at first. I watched countless YouTube tutorials and practiced on an old knife I didn’t mind potentially ruining. After several tries, I finally got the hang of it. Now, sharpening my knives has become a satisfying ritual. There’s something incredibly rewarding about working with a perfectly sharp blade. It makes cooking so much more enjoyable and efficient.
Different Sharpening Methods
America’s Test Kitchen explains, “There are various sharpening methods available, from whetstones to electric sharpeners. Choose the method that best suits your skill level and knife type.”
Electric Sharpeners
These are great for those who want a quick and easy solution. Simply pull the knife through the slots a few times, and you’re done. However, be cautious as they can remove more metal than necessary.
Manual Pull-Through Sharpeners
These devices are user-friendly and perfect for beginners. Just pull the knife through the sharpener a few times to restore its edge. They are less precise than whetstones but get the job done for most home cooks.
Advanced Sharpening Techniques
Once you’re comfortable with basic sharpening, you can explore more advanced techniques:
- Double-Bevel Edge: This involves sharpening the blade at two different angles to create a more durable edge.
- Convex Edge: This technique rounds the edge slightly, providing a sharper and more resilient blade.
- Mirror Polishing: Using a very fine stone, you can polish the edge to a mirror-like finish, enhancing sharpness and reducing friction.
Resources for Learning
While there may not be specific scientific studies on knife sharpening, these resources offer valuable information and guidance:
- Culinary Schools: Culinary schools often incorporate knife skills training, including sharpening techniques.
- Cookbook Authors: Many renowned cookbook authors include sections on knife care and maintenance.
- Kitchen Supply Stores: Stores like Williams Sonoma and Sur La Table offer a variety of sharpening tools and expert advice.
- Online Tutorials: Websites and platforms like YouTube offer numerous tutorials on different knife sharpening methods.
Conclusion
A sharp knife is an essential tool for any home cook. As Julia Child, a culinary icon, said, “A sharp knife enhances your cooking experience. It’s a tool that should be treated with care and respect.” By understanding the importance of sharp knives, choosing the right sharpening tools, and practicing proper techniques, you can maintain your knives in top condition and enjoy a more efficient and enjoyable cooking experience.
Whether you’re a seasoned cook or just starting, investing time in learning how to sharpen your knives will pay off in the long run. Remember, practice makes perfect, and with patience and perseverance, you’ll be sharpening your knives like a pro in no time. Happy cooking!
Related posts:
 How to Reset Filter Light on Samsung Fridge: A Step-by-Step Guide
 Chill Out: Choosing the Perfect Refrigerator for Your Kitchen
 Entertaining Essentials: Refrigerators for Hosting Guests
 How Many Quarts in a 9 x 13 Baking Pan?
 Top Online Cooking Communities for Home Cooks
 Knife Skills 101: Essential Techniques for Every Home Cook
 Professional Chef Secrets: Must-Have Knives for Home Cooks
