Installing new handles on doors or cabinets can breathe new life into your home. Whether you’re updating old handles to match a new decor theme or simply replacing broken ones, handle installation is a manageable DIY project. This guide will walk you through the process, from gathering tools to final touches, ensuring you achieve professional-looking results.
Why Handle Installation Matters
Handles are more than just functional hardware; they contribute significantly to the aesthetic of your space. Updating handles can transform the look of a room, adding a touch of elegance or modern flair. As Bob Vila, the renowned home improvement expert, puts it, “Installing new handles can be a relatively simple DIY project. With the right tools and a little patience, you can achieve professional-looking results.”
Tools and Materials You’ll Need
Essential Tools
Before you dive into the installation, gather the following tools:
- Screwdriver: A standard or Phillips screwdriver depending on your screws.
- Drill: If you’re installing handles where no existing holes are present.
- Tape Measure: For accurate measurements.
- Level: To ensure handles are aligned properly.
- Pencil: For marking drill points.
- Screws and Anchors: Typically included with the handle set, but have extras on hand just in case.
As Home Depot suggests, “Invest in quality tools, such as a screwdriver and drill, to ensure a smooth installation process.”
Materials
- New Handles: Choose handles that match your style and fit your existing holes, or be prepared to drill new ones.
- Mounting Plates: Often included with the handle kit.
- Hardware: Screws and any necessary anchors.
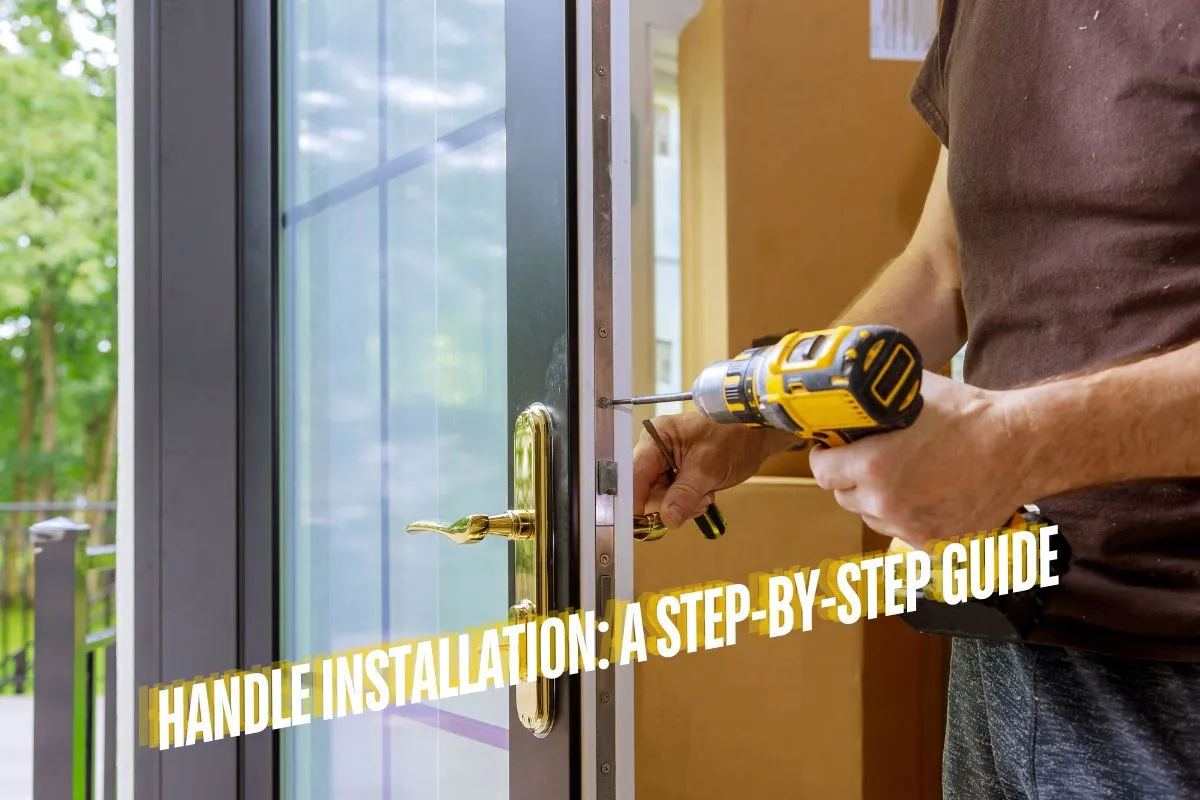
Step-by-Step Installation Process
1. Remove the Old Handles
If you’re replacing existing handles, start by removing them. Use a screwdriver to take out the screws holding the old handles in place. Gently pull the handle away from the door or cabinet. If there are any old mounting plates or hardware, remove those as well.
Personal Anecdote: I remember my first handle installation project. I was nervous about taking apart the old handles, worried I might break something. But once I got started, it was a straightforward process, and I was pleasantly surprised by how easy it was to remove the old handles!
2. Prepare the Surface
Proper preparation is key to a successful installation. Clean the area where you’ll be installing the new handles to remove any dust or debris. This ensures a smooth and secure fit.
This Old House emphasizes, “Proper preparation is essential for a successful handle installation. Ensure the surface is clean and free of any debris.”
3. Measure and Mark
Accurate measurements are crucial. Use a tape measure to determine the distance between the screw holes on the new handle. If you’re installing new holes, mark their positions on the door or cabinet using a pencil. Use a level to make sure your marks are even.
Bob Vila advises, “Measure the distance between screw holes carefully to ensure proper alignment and prevent damage to your door.”
4. Drill Holes (If Needed)
If you’re installing handles where no holes currently exist, drill the required holes based on the measurements you’ve marked. Use a drill bit that matches the size of the screws for a snug fit. Be careful not to drill too deep or too wide, which could damage the door or cabinet.
5. Attach the Handles
Align the new handles with the holes and attach them using the screws provided. If your handle set includes mounting plates, place these first and then secure the handles on top. Ensure everything is aligned properly before tightening the screws.
DIY Network notes, “Choose the right hardware for your project. Consider factors like the door material, style, and desired finish.”
6. Test the Handles
Once installed, test the handles to ensure they operate smoothly. Open and close the door or drawer a few times to check for proper alignment and functionality. Make any adjustments if necessary.
7. Final Touches
If you have any gaps around the handles or if they seem loose, tighten the screws and fill any gaps with appropriate fillers or caulk. Clean up the area, removing any pencil marks or debris from the installation process.
Troubleshooting Common Issues
Misaligned Handles
If your handles aren’t aligned properly, recheck your measurements and adjust as needed. It might be necessary to remove and reposition the handles to achieve a perfect fit.
Loose Handles
If the handles are loose, ensure the screws are tightened securely. If the problem persists, check for any stripped screw holes or damaged threads.
Incorrect Drill Holes
If the drill holes are misplaced, you may need to fill the old holes and drill new ones. Use wood filler or caulk to repair any mistakes before re-drilling.
Enhancing Your DIY Experience
Seek Expert Advice
If you’re unsure about any part of the installation process, don’t hesitate to consult with a knowledgeable hardware store associate. They can offer valuable guidance and tips based on their experience.
As a hardware store associate might suggest, “If you’re unsure about the installation process, consult with a knowledgeable hardware store associate for guidance.”
Explore Online Resources
There are numerous online resources available to help you with your DIY project. Websites like Home Improvement blogs and platforms such as YouTube offer detailed tutorials and tips for handle installation. These can provide visual guidance and additional insights to ensure your project is a success.
Manufacturer’s Instructions
Always refer to the manufacturer’s instructions for specific guidance related to the handles you’re installing. Different brands may have unique requirements or recommendations for optimal installation.
Final Thoughts
Handle installation can be a rewarding DIY project that enhances both the functionality and appearance of your home. By following these steps and using the right tools, you can achieve a professional finish without needing to hire a professional. Remember, with a little patience and attention to detail, you’ll be able to update your handles and enjoy the refreshed look of your space.
Unique Insight: One key to a successful handle installation is ensuring that the hardware complements the overall style of your room. Sometimes, the simplest upgrades can make the biggest impact, and handles are a perfect example of this. They offer an easy and affordable way to refresh your space and give it a new look.
Happy DIY-ing!
Related posts:
 How to Install an Interior Door Like a Pro
 How to Factory Reset MyQ Garage Door Opener: A Simple Guide
 Locksmith Pasadena MD Servleader
 Security First: Choosing the Right Exterior Doors for Your Home
 Elevate Your Space: Choosing the Perfect Showpiece for Your Home
 How to Charge Solar Lights Without Sun
 Should I Unplug My Refrigerator If Away for Four Months?