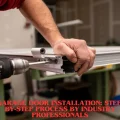
Have you ever watched a professional install a garage door and thought, “Wow, they make it look so easy!” You’re not alone. Many homeowners are curious about the process. With the right approach, plenty of patience, and a few expert tricks, a garage door installation can be a smooth and satisfying project.
In this guide, I’ll walk you through the easiest steps, share lessons learned from industry pros, sprinkle in real-life stories, and answer the questions homeowners ask most. This way, you get all the friendly, honest advice you need—just like a neighbor sharing tips over the fence.
Why a Good Garage Door Installation Matters
A garage door is more than just a way in and out of your garage. It keeps your home safe, cuts out noisy street sounds, and even boosts curb appeal.
When my friend Lisa bought her first home, she didn’t think much about the garage door—until it started making a screechy sound every morning. She called in a pro who explained that a careful installation means everything: it keeps your door quiet, safe, and working for years. Since then, Lisa always says, “Don’t rush! A good install saves headaches later.”
Step-by-Step Guide: How Experts Install a Garage Door
1. Measuring and Planning
“Measure twice, cut once.” That’s what pros always say! Before you start anything:
-
Measure the width and height of your garage door opening.
-
Check for any pipes, wires, or things that might get in the way.
-
Clear out the garage so you have space to work.
Anecdote: My neighbor Tom once forgot to check above his garage opening for a hanging light. When he lifted the new door, it smashed the fixture! Always scan for surprises before you start.
2. Gather Your Tools
Here’s what most professional installers use:
-
Power drill
-
Screwdrivers (flat and Phillips head)
-
Level
-
Measuring tape
-
Stepladder
-
Safety glasses and work gloves
Make sure you also have every part from your garage door kit—like panels, tracks, springs, rollers, hinges, and cables.
3. Setting the Door Panels
-
Lay the bottom door panel on the ground at the opening.
-
Use your level to make sure it’s perfectly straight.
-
Attach the handles and hinges.
-
Set the next panel on top, connect with hinges, and so on until you stack all the panels.
Unique insight: Most pros never do this step alone. These panels can get heavy—having a helper is safer and makes lining things up much easier.
4. Installing the Tracks
-
Attach vertical tracks on both sides of the opening.
-
Slide the rollers into the panels and tracks.
-
Lift the panel stack into place and secure the tracks.
-
Add horizontal and curved tracks that go towards the back of your garage.
Here’s a trick I learned from a pro: Don’t overtighten the bolts—just make them snug. If you crank them too hard, the track might bend.
5. Setting Up the Spring System
This step takes extra care. Most garage doors use one of these:
-
Torsion Springs (mounted above the door)
-
Extension Springs (along the sides)
Spring systems are under big tension and can be dangerous. Even my uncle, who’s handy with tools, called for help on this part when he heard tales of snapped springs.
-
Attach the springs and cables according to the manual.
-
Use special winding bars—not a screwdriver—to tighten torsion springs.
Personal story: I once saw a neighbor attempt the spring his garage. The bar flipped out of his hand! He was lucky to miss injury but called a pro for the rest. Moral: If you feel unsure, call for help.
6. Installing the Opener
If you’re adding an automatic opener:
-
Attach the opener to the ceiling according to the instructions.
-
Connect the opener arm to the top panel.
-
Hook up safety sensors on each side of the door, about 6 inches above the floor.
-
Plug it all in and test.
Always check the door for smooth movement and test the opener’s safety features by putting an object in the door’s path to see if it reverses.
7. Double Check and Test
You’re almost done! Now:
-
Tighten every bolt and screw.
-
Test the door’s movement up and down several times.
-
Listen for any strange noises.
-
Clean tracks and rollers.
-
Lubricate moving parts with recommended oil.
Unique tip: Take a photo of your completed work. That way, if you ever need help from a pro later, you can show them exactly how things look.
How Much Does It Cost to Set Up a Garage Door?
Homeowners often ask, “What am I looking at, price-wise?” Here’s a simple guide:
-
Professional install (labor only): $300 to $600 on average.
-
Special doors, extra features, or tough installs can cost more.
-
Always get an estimate in writing before work begins so you know what’s included.
When I helped my aunt research companies, we found prices varied a lot. Some included the removal of the old door. Others didn’t. It’s worth asking questions!
How Much Does It Cost to Fit a New Garage Door?
Let’s break down the total cost—door plus install.
| Type of Door | Average Cost with Fitting |
|---|---|
| Standard steel single door | $700–$1,200 |
| Insulated double garage door | $1,300–$2,500 |
| Custom or designer doors | $2,000 and up |
If you want a basic door, you’ll spend less. Add insulation, windows, or fancy materials, and the price rises.
What Is the Cheapest Type of Garage Door?
Looking to save money? Here are the least expensive options:
-
Single-layer steel doors: They’re strong, budget-friendly, but not insulated.
-
Aluminum doors: Lightweight and affordable, but they can dent.
-
Uninsulated wood doors: Attractive but require more care.
Anecdote: I once chatted with a neighbor who picked the cheapest steel option. His garage got much hotter in summer, so he later added insulation. Sometimes, paying a little more at first saves trouble down the road.
Can You Install a Garage Door Yourself?
Many handy homeowners have done it alone, so it’s possible!
Pros of DIY:
-
Save money on labor.
-
Learn a new skill.
Cons of DIY:
-
Springs are dangerous if you don’t have experience.
-
Takes more time (plan a full day or more).
-
You need lots of tools.
-
Many warranties require a professional installation for coverage.
Personal note: I once tried to help my friend install his garage door. We lost some tiny screws and had to improvise. After a few hours, he called a pro who finished it in an hour—sometimes it’s worth hiring help!
Unique Insights from Industry Experts
-
Teamwork is key. Professionals almost always work in pairs for safety and speed.
-
Always follow the manual. No two doors or kits are exactly alike.
-
Protect your fingers. Watch for pinch points when assembling panels and tracks.
-
Label everything. Pros mark parts as they go to avoid mix-ups.
-
Take breaks. Rushing can lead to mistakes.
I once asked a professional installer his biggest tip. He said, “Take your time and triple-check your work. Rushing leads to problems later.”
Final Thoughts
A garage door may feel huge, but the right approach makes installation easy. Go step by step, use your eyes and ears, and don’t be afraid to ask for expert help if you get stuck.
When my cousin finally had her new door up (with a little help!), she felt like a champion every time it rolled up smoothly. That’s what a good install does—it gives you pride and peace of mind.
So, whether you DIY or call a pro, enjoy the process. Your garage (and family) deserve a safe, smooth, and reliable door.
Related posts:
 Secure Your Home: How to Choose the Best Exterior Doors
 The Door Buying Guide: Everything You Need to Know Before You Buy
 Easy DIY Door Maintenance Tips to Keep Your Doors Looking Great
 Transform Your Home with New Door Handles: A Simple Guide
 Eco-Conscious Homeowners: Energy-Efficient Garage Doors
 Smith and Locke Door Handles: Elegance Meets Functionality
 Smith & Locke Door Handles: A Blend of Style and Functionality