Building your pallet bed is a fun and affordable way to add a personal touch to your bedroom. With some creativity and basic tools, you can create a unique, stylish bed that will be the centerpiece of your room. This guide will walk you through each step, ensuring your DIY project is successful, safe, and enjoyable.
Why Choose a Pallet Bed?
Pallet beds have become increasingly popular for several reasons. They’re cost-effective, environmentally friendly, and customizable. Plus, the rustic charm of wooden pallets adds a unique aesthetic to any space.
One of the best things about making a pallet bed is the satisfaction of creating something with your own hands. I remember when I first built mine; the sense of accomplishment was incredible. Not only did I save money, but I also created a piece of furniture that perfectly suited my style and needs.
Materials and Tools You’ll Need
Before starting your project, gather the following materials and tools:
Materials:
- Wooden pallets (ensure they are heat-treated and free of harmful chemicals)
- Sandpaper or an electric sander
- Wood screws or nails
- A mattress that fits your desired bed size
- Paint or stain (optional)
- Upholstery (optional)
Tools:
- Power drill or hammer
- Measuring tape
- Saw (if you need to cut the pallets)
- Gloves and safety glasses
- Paintbrushes (if you’re painting or staining)
Step 1: Select and Prepare Your Pallets
Not all pallets are created equal. It’s essential to choose pallets that are sturdy, clean, and free of any chemicals that could be harmful. Look for pallets marked with “HT” (heat-treated) rather than “MB” (methyl bromide), which indicates chemical treatment.
Expert Tip: A home improvement expert advises, “Ensure the pallets you use are heat-treated and free of any harmful chemicals.”
Once you’ve selected your pallets, it’s time to prepare them. Start by sanding the wood to remove any splinters and create a smooth surface. This step is crucial, especially if you plan on leaving the wood exposed.
Personal Anecdote: When I built my pallet bed, I spent extra time sanding each pallet. It was a tedious task, but it paid off. The smooth finish made the bed look polished and professional.
Step 2: Design Your Bed Frame
The beauty of a DIY pallet bed is that you can design it to fit your space and style. Consider the size of your mattress and the look you want to achieve. Do you want a low-profile bed or one with storage space underneath?
Lay out your pallets on the floor to visualize the frame. You may need to cut some pallets to fit your design. If so, use a saw to make the necessary adjustments.
Expert Tip: An interior designer suggests, “Customize your pallet bed with paint, stain, or upholstery to match your desired style.”
Step 3: Assemble the Bed Frame
Once you’ve finalized your design, it’s time to assemble the bed frame. Place the pallets in your chosen arrangement, and secure them together using wood screws or nails. Be sure to drill pilot holes before inserting the screws to prevent the wood from splitting.
Safety Reminder: Always wear protective gear, such as gloves and safety glasses, when working with wood and power tools. A safety expert notes, “Always wear protective gear, such as gloves and safety glasses, when working with wood and power tools.”
Expert Tip: A DIY enthusiast shares, “Creating a pallet bed is a rewarding and cost-effective project that can add a unique touch to your bedroom.”
Step 4: Add Finishing Touches
With the frame assembled, you can now add any finishing touches. If you want a natural look, apply a clear sealant to protect the wood. For a more polished appearance, consider painting or staining the pallets to match your room’s decor.
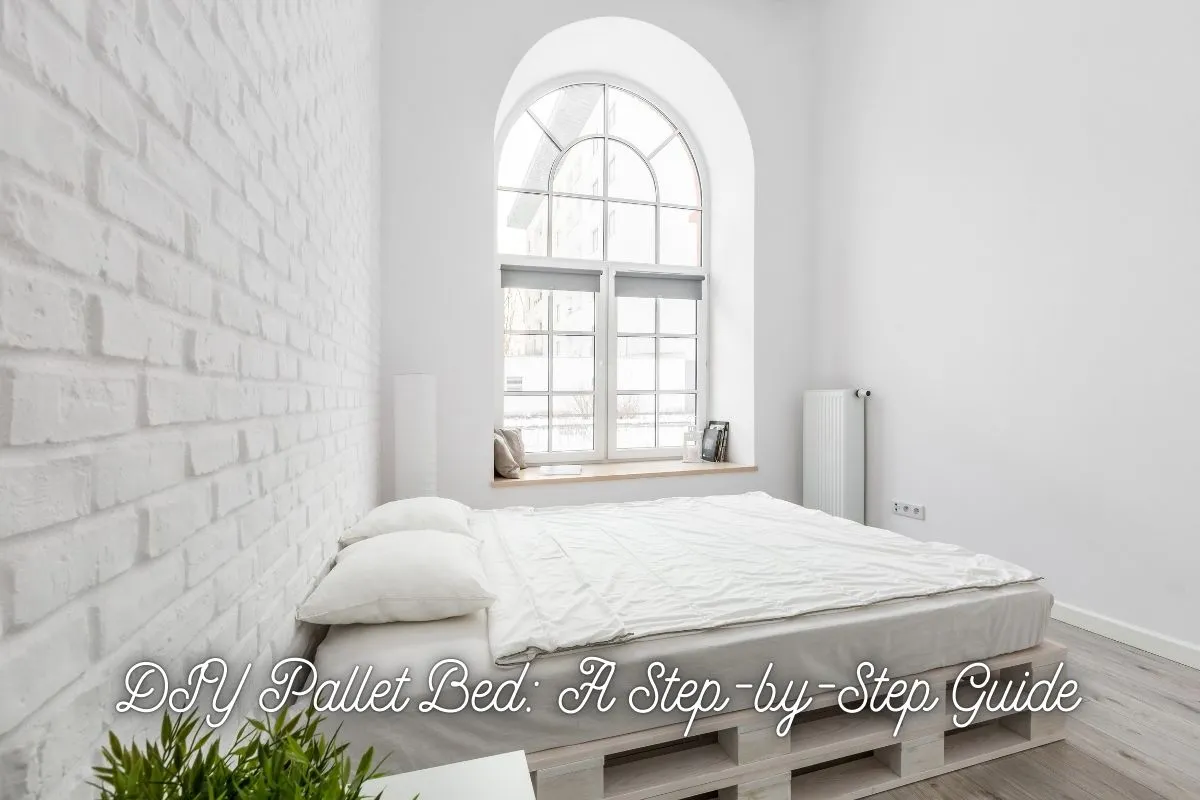
Personal Anecdote: I decided to paint my pallet bed white to match my room’s color scheme. The paint gave the bed a clean, modern look that I love. Plus, it was fun to do a little DIY painting project!
You can also add a headboard or footboard for extra style and comfort. Some people choose to upholster their pallet beds for a softer, more luxurious feel. This can be done by attaching foam and fabric to the pallets.
Expert Tip: A homeowner suggests, “Consider adding a headboard or footboard to complete the look of your pallet bed.”
Step 5: Place the Mattress and Enjoy
Now that your pallet bed is complete, it’s time to add the mattress. Place it on top of the pallets, and your bed is ready to use. You’ll be amazed at how sturdy and stylish your new bed looks.
Expert Tip: A furniture restoration specialist advises, “Sand down the pallets to remove splinters and create a smooth surface before applying any finishes.”
Additional Tips for a Successful DIY Pallet Bed
- Choose the Right Pallets: Not all pallets are suitable for furniture. Look for pallets made from hardwoods, as they are more durable and less likely to break under pressure.
- Check for Pests: Before using any pallets, inspect them for signs of pests. Wooden pallets can harbor insects, so it’s essential to ensure they’re clean and safe.
- Use Quality Fasteners: Invest in good-quality screws or nails to ensure your bed frame stays together securely. Cheap fasteners can weaken over time, causing the bed to become unstable.
- Consider Adding Storage: If you have a small room, consider adding storage options to your pallet bed. You can stack additional pallets underneath the bed frame to create storage space for books, shoes, or other items.
- Regular Maintenance: To keep your pallet bed in top condition, regularly inspect it for any loose screws or nails. Tighten them as needed to maintain the bed’s stability.
Expert Tip: A home improvement expert suggests, “Ensure the pallets you use are heat-treated and free of any harmful chemicals.”
Conclusion: The Joy of Building Your Pallet Bed
Building a pallet bed is more than just a DIY project; it’s an opportunity to create something unique and functional for your home. The process is straightforward, even for beginners, and the results can be incredibly rewarding.
Whether you’re looking to save money, customize your furniture, or simply enjoy the satisfaction of a DIY project, a pallet bed is a fantastic option. Plus, it’s an eco-friendly choice that repurposes materials that might otherwise go to waste.
Personal Anecdote: Looking back on my pallet bed project, I can honestly say it was one of the most enjoyable DIY projects I’ve ever undertaken. The sense of pride I feel every time I walk into my room and see the bed I built is unmatched.
With this guide, you have everything you need to get started on your pallet bed. So, roll up your sleeves, grab your tools, and start building a bed that’s truly your own.
Resources for Further Inspiration
- DIY Websites: Websites like This Old House, Bob Vila, and The Spruce offer detailed tutorials and step-by-step instructions for building a pallet bed.
- Home Improvement Stores: Stores like Home Depot and Lowe’s can provide information on materials and tools needed for the project.
- Furniture Restoration Forums: Online forums dedicated to furniture restoration and DIY projects can offer advice and inspiration.
- Local Building Codes: Consult local building codes and regulations to ensure your pallet bed meets safety standards.
Final Thoughts
A DIY pallet bed is not only a practical and stylish addition to your home, but it’s also a project that allows you to express your creativity. With the right materials, tools, and a bit of elbow grease, you can create a beautiful, functional bed that will serve you well for years to come.


