When it comes to kitchen storage, shelves are an easy and smart way to add space without remodeling or breaking the bank. What’s even better? You don’t need costly materials or hiring pros to get shelves that look sleek, sturdy, and stylish.
From reclaimed wood to industrial pipes and clever IKEA hacks, I’ve gathered DIY shelving ideas that are budget-friendly but look like you spent much more. I still remember the day I built my first open kitchen shelf from an old plank. It took less than an afternoon, cost under $25, and suddenly my kitchen felt cleaner and more organized. Sometimes simple is all you need.
This guide shows 10 clever kitchen shelving projects, plus extra tips and ideas to make the most out of your kitchen walls and corners.
10 Clever Shelving Ideas to Spruce Up Your Kitchen’s Vibe
1. Reclaimed Wood Floating Shelves
Floating shelves made from reclaimed wood add a warm, rustic touch to your kitchen. You can find old wood at salvage yards or even old pallets.
-
Estimated cost: $20–$40 (mainly for brackets and screws).
-
Build time: 2 to 3 hours, including sanding and finishing.
-
Why it works: You get sturdy, natural shelves that have character.
I used this idea in my first rental apartment. The rough wood gave the kitchen charm without tearing down walls or painting. Plus, floating shelves keep things airy and open.
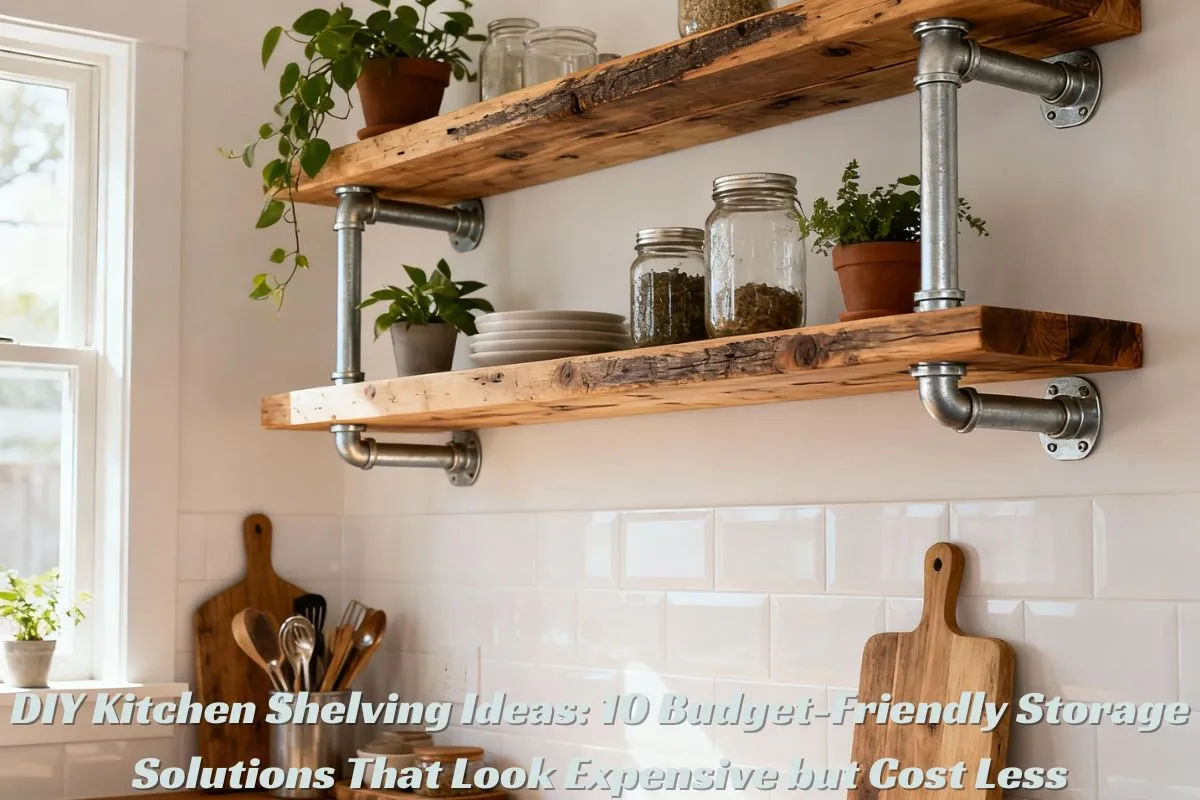
2. Industrial Pipe Shelves
For a cool, modern look, try shelves supported by black industrial pipes. They’re robust and add a touch of factory-style chic.
-
Materials: Wood planks + black iron pipes and flanges from a hardware store.
-
Estimated cost: $50–$70 for a set of 2 shelves.
-
Build time: Around 3 hours, mostly for assembling and wall-mounting.
These shelves are perfect for storing jars, mugs, or display dishes. A friend of mine installed these and got so many compliments—people thought he hired a designer.
3. IKEA Hacks for Kitchen Shelves
IKEA shelving units modified with your own wood or painted for contrast can give you flexible storage that looks custom.
-
Popular models: EKBY, LACK, or IVAR shelves.
-
Cost: $30–$60 depending on size and add-ons.
-
Build time: 1 to 2 hours.
Adding legs, painting, or swapping wood panels upgrades these inexpensive shelves to fit your style. It’s a quick fix if you want something easy and adjustable.
4. Rustic Crate Shelves
Old wood crates mounted on the wall can double as quirky shelves for small items and plants. They’re light, artistic, and environmentally friendly.
-
Cost: Under $25 for wood crates or use free recycled ones.
-
Time: Less than 1 hour for mounting.
I once used this idea to display my herb garden. The crates made a little green corner in my kitchen and saved me on buying expensive planters.
5. Corner Shelves Using Triangle Brackets
Corners are often wasted space. Simple triangle brackets with wood planks turn corners into useful shelves for spices, small cookbooks, or mugs.
-
Cost: About $15–$30 for brackets and wood.
-
Build time: 1 to 2 hours.
Corners don’t have to be dark and neglected. I mounted these shelves in my small kitchen nook and gained extra room without crowding the counter.
6. Pegboard Kitchen Shelves
Pegboards are incredibly versatile. You can add small shelves, hooks, and spice racks all on one panel.
-
Cost: $20–$40 for pegboard and accessories.
-
Build time: 1 to 2 hours.
This idea is great if you love reorganizing your kitchen often. I switch up my pegboard every few months depending on what I need near the stove.
7. Ladder Shelf for Kitchen Display
A leaning ladder shelf fits nicely against a wall and offers open-tier storage. Use it for frequently used pots or decorative kitchen items.
-
Estimated cost: $60–$100 depending on size and materials.
-
Build time: 3 to 4 hours if building from scratch.
It looks like a statement piece and doubles as a small pantry. It’s perfect if you want storage that’s easy to move or rearrange.
8. Under-Cabinet Shelves
Small shelves fitted under your existing cabinets offer extra space for mugs, spices, or kitchen gadgets without using wall space.
-
Cost: $10–$30 mostly for mounting hardware.
-
Build time: 1 hour.
This is my go-to solution for coffee mugs. Simple, handy, and keeps my counters clutter-free.
9. Wire Baskets on Wall Shelves
Add wire baskets or bins on floating shelves to create compartments for fruits, vegetables, or snacks.
-
Cost: $20–$40 depending on basket size.
-
Build time: 30 minutes – 1 hour.
The baskets add texture and organize loose items. Once my family started doing this, there was no more kitchen mess!
10. Classic Wooden Countertop Shelf
A simple two-tier wooden shelf on your countertop can hold frequently used items. It looks classic and adds vertical storage.
-
Cost: $15–$30 for wood and shelf brackets.
-
Build time: 2 hours including sanding and finishing.
This shelf is great if you want to keep everyday things like coffee, tea, or olive oils within reach but off the counter surface.
3 More Simple Kitchen Storage Ideas
-
Use magnetic strips on the wall to hold knives or spice tins. They’re space-saving and keep sharp objects easy to grab.
-
Attach a hanging rail with hooks for utensils or pots from the ceiling or under cabinets.
-
Repurpose old wooden ladders as plant stands or shelving units near kitchen windows.
These ideas add layers of storage without changing your kitchen layout or spending much.
How to Build a Classic Countertop Kitchen Shelf
Want to build a simple, classic countertop shelf yourself? Here’s how:
-
Pick wood planks around 2 feet long and 6–10 inches wide. Sand edges smooth.
-
Use two or three shelf supports or brackets, spaced evenly.
-
Attach the longer plank as the base and the shorter plank above it.
-
Finish with paint or stain to match your kitchen.
This type of shelf elevates your storage and makes your counters look tidy and organized. I built one on a whim, and it changed how I used my countertop every day.
5 Simple DIY Space Saving Kitchen Storage Ideas
-
Hang pots and pans on wall-mounted hooks instead of crowding cabinets.
-
Use stackable baskets or bins inside shelves to multiply storage vertical space.
-
Add a pull-out spice rack inside your cabinet door.
-
Use small rolling carts or trolleys as movable shelves.
-
Create a shelf above your fridge for rarely used but bulky kitchen items.
All these help you reclaim wasted space and keep your kitchen neat without expensive renovations.
Final Thoughts
Shelving in the kitchen doesn’t need to be complicated or costly. These DIY shelving ideas prove that with a little creativity and basic materials, you can build storage solutions that look expensive and hold a lot.
The key is to use what you have or can easily source—whether scraps of reclaimed wood, simple brackets, or an IKEA piece waiting for a makeover.
Every shelf you build adds a layer of personality and function to your kitchen, making it a place you love to cook and spend time in.
Happy shelving!
Related posts:
 Entertaining Essentials: Refrigerators for Hosting Guests
 How Many Quarts in a 9 x 13 Baking Pan?
 Safety First: Knife Handling Tips for Home Cooks
 Here Is How To Clean Your Stainless Steel Cookware Easily
 Compact Laminate Worktops Reviewed by Industry Experts
 Quiet Luxury Fitted Kitchens: Hidden Designs for 2025
 What It’s Like to Cook with a Flavel Cooker Daily